Do you want to begin brewing your own beer from home? You’re in the right place.
Homebrewing beer has become a hobby for millions of people across the world, and it’s only becoming more and more popular.
Besides allowing people to create their own beer from home (and save money that would have otherwise been spent at the bar) homebrewing is a great way to get creative with recipes.
Homebrewing is a hobby that has been around for centuries. Throughout history, people would take their time making beer in their homes.
Nowadays, there are several ways that you can start brewing beer right in your kitchen.
With the advent of modern technology and science, the process of making beer has become much easier than ever before.
However, with all the new gadgets and gizmos that are out there, it can be hard to know which ones you really need!
Despite the fact that homebrewing is one of the most popular pastimes, knowing where to get started on your homebrewing journey can be tricky to figure out – which is where we come in to lend you a helping hand.
If you are interested in learning more about home brewing, then this article will provide all the information that you need to get started.
We have included everything from equipment to ingredients so that you can start right away.
If you’ve ever wanted to try making your own beer, this article will help you jumpstart your journey into home brewing.
So, without further ado, whenever you’re ready, just keep reading to discover how you can begin making your own beer from the comfort of your very own home!
What Is Homebrewing?
Homebrewing is simply the process of creating beer using ingredients other than malt extract or grain alcohol.
It can be done with any type of beer recipe, including ale, lager, porter, stout, and many other types of light and dark beer.
Typically, more often than not, the most common ingredient used in homebrewing is malted barley, although this can sometimes vary.
Other grains such as wheat, rye, oats, corn, rice, buckwheat, millet, sorghum, honey, molasses, maple syrup, fruits, vegetables, herbs, spices, and even coffee beans can also be used to make beer – although they are typically less effective at converting starch to sugar than malted barley.
To follow on, the term “homebrewing” basically refers to the process of making beer at home…hence the name.
As we have briefly touched upon above, homebrewing involves using various types of grains, hops, yeast, water, and other ingredients to make beer from the comfort of your very own home.
In addition to being able to brew your own beer, homebrewers can use their creations to enter competitions and earn medals. This is why homebrewing is such an exciting hobby.
How Much Does it Cost to Homebrew Your Own Beer?
You do not have to spend a lot of money to start brewing your own beer. All you need is an adequate amount of space, a few basic tools, and a large container.
Some people also recommend purchasing a fermenter which helps them store their beer for longer periods of time.
In addition, there are kits available that contain everything that you need to begin brewing beer. These kits come with instructions on how to use them and they usually include a recipe book.
Before you purchase any kit, however, you should know what type of beer you want to make, as a light beer will need different ingredients from a dark beer.
Another important thing to consider when buying a kit is whether you want to make light beer or dark beer.
Light beer contains less than 6% alcohol while dark beer contains over 8%. Dark beer is generally preferred over light beer because it tastes better.
How Long Does it Take to Brew My Own Beer?
It takes approximately three weeks to complete a full cycle of fermentation. During this period, you will notice bubbles forming in the bottle or jar.
As the beer ferments, it becomes clearer and tastier.
When the fermentation is completed, you will need to transfer the beer to bottles or jars. From that point, the beer will then need to mature for a period of at least 2 weeks.
What Types of Beer Can be Homebrewed?
There are two types of beer: ale and lager. Ale is fermented at warmer temperatures (60 °F) while lagers are fermented at cooler temperatures (45 °F).
Lager beer tends to taste better than ale beer because it ages well. However, ale beer is easier to make and requires fewer steps.
If you decide to go with ale beer, you can choose between pale ale, amber ale, brown ale, black IPA, red ale, and others.
If you want to make lager beer, you can opt for pilsner, hefeweizen, dunkelweizen, bock, kölsch, märzen, altbier, and others.
Commonly Used Terms Used In Homebrewing
We’re sure that you’ll be in complete agreement with us when we say that homebrewing can be a little confusing and daunting at first – especially when you take into account all the various terminologies that are frequently used.
So, to help you start your homebrewing journey on the right foot, the following are some of the terms that you might hear when talking about homebrewing:
Wort: This is the name given to the mixture of malt and water that is used to make beer.
Mash Tun: A vessel that holds the crushed grains so that they can steep in hot water. The enzymes found in the grain convert the starches into fermentable sugars.
Boiling Pot/Kettle: This is the pot that you use to boil the wort. Although, you may sometimes see this referred to as a kettle because if it is large enough, it will be able to accommodate the water and wort that you are boiling. Whether you use a boiling pot or kettle will ultimately depend on how much beer you are planning on brewing, and in turn, the number of ingredients that you are using.
Lauter Tun: This is a special vessel that is used to separate the sweet wort from the hops to allow the wort to boil.
Hydrometer: This is a tool that measures the specific gravity of the wort. Specific gravity tells us how dense the wort is. When you add hops to the wort, you and other solids.
Sparge Water: This is the hot water that is used to rinse the grains. Oftentimes the hot liquor tank will supply sparge water but you can also use cold tap water.
Hop Basket: This is a device that catches hop pellets leftover from whirlpooling. They are placed inside a plastic bag until they are ready to be pitched back into the next brew.
Chillers: There are many different types of chillers. Each type works better on certain styles of beers.
Racking cane: This is a long tube that allows you to siphon the fermented beer off of the sedimented yeast onto another container.
Bottle filler: This is a machine that fills bottles with beer. It uses air pressure to force the beer through a nozzle.
Airlock: An airlock is a device that is put into the bottle after filling to keep oxygen out.
Beer Engine: This is a term that refers to the amount of sugar that was added during the mash step. More body means more alcohol and less carbonation.
Yeast Nutrient Packet: These packets contain nutrients that help promote healthy yeast growth.
Aerate: This is a method of adding oxygen to the wort or beer.
Starter Kit: This is a collection of items that includes a hydrometer cup, a funnel, an airlock, sanitized containers, etc.
Sanitize: This is a process where all items that come in contact with your wort or beer are cleaned thoroughly.
Sterilize: This is a similar process to sanitizing except that it kills any microorganisms that may be present.
Wort Chilling: This is a process that involves chilling the wort prior to pitching the yeast.
Pitch Rate: This is the number of cells of yeast that should be pitched for every 5 gallons of wort.
Primary Fermentation: This is the first stage of fermentation. During primary fermentation, the yeast consumes most of the available sugars in the wort and produces ethanol (alcohol) and CO2.
Secondary Fermentation: This is the second stage of fermentation. The yeast continues to consume the remaining sugars and produce additional byproducts such as esters and diacetyl.
Kegs: A keg is a steel cylinder that holds about 60-70 gallons of beer.
Carbon Dioxide: This gas is produced when fermenting beer and is responsible for making beer fizzy.
Esters: These are chemical compounds that give beer its fruity flavor.
Diacetyl: This is a chemical compound that gives beer buttery flavors.
Fermentation: This is what happens when yeast eats sugars and turns them into alcohol and carbon dioxide.
Maturation: After fermentation has finished, the beer will need time to mature before drinking.
Dry Hopping: This is a technique where hops are added to the boil at the end of the boil.
Boiling: This is the process of heating water up to 212 Boiling: This is the main part of the brewing process. In this step, water is heated to create a solution called “wort”.
Sparge: This is the process of rinsing grains to extract their degrees Fahrenheit.
Sparge Water: This is water that is heated and runs through the grains while mashing to extract sugars.
Sparge Water: This is the liquid that drains from the grain bed after mashing.
Mash Tun: This is a large vessel that contains the mash tun to rinse out the grain.
Batch Size: This is the total volume of liquid you want to make.
OG Mash Out: This is the process where you take the spent grains from the mash tun and mix them with cold water.
Cool Crashing: This is the process by which the wort is cooled down so that it can be stored in bottles or kegs.
Bottling: This is the final step of bottling. It involves filling the bottle with beer and capping it.
Bottles: This is the container in which beer is bottled.
Kettle: This is the pot used to heat the water for boiling.
If you’re just starting out in homebrewing, we recommend that you make a note of all the terms that we have just shared above (or save this page) so that you can begin familiarizing yourself with the various terms that are often used in the homebrewing community.
By doing so, you’re going to find that you feel a lot more confident understanding instructions and deciphering the various equipment, stages, and ingredients used within the homebrewing process!
As a side note, you should also keep in mind that you’re probably not going to need everything that we have listed above.
Instead, we recommend that you use the list that we have shared above as guidance for equipment and items that you might find that you need as you become more experienced as a home brewer.
With all that being said, now that we have covered some of the most basic terminologies you should be familiar with, let’s move on to our next section.
The Different Homebrewing Equipment You Will Need
First things first, before you even get started homebrewing, it’s a good idea to make sure that you are familiar with all the different home brewing equipment that you are going to need.
Below, we are going to be providing you with a helpful list and description of each homebrewing piece of equipment that you are going to need, as well as what it is used for:
Fermentation Bucket
A fermentation bucket is an essential piece of homebrewing equipment. It is basically a large container that holds your wort (unfermented beer).
During the primary stage of fermentation, the wort must stay in a warm place, usually around 75 °F. Therefore, if you don’t use a fermentation bucket, you won’t be able to ferment your beer properly.
Hydrometer
A hydrometer is used to measure specific gravity. Specific gravity measures the density of a liquid compared to pure water.
When measuring the specific gravity of a solution, the hydrometer is lowered into the solution until it floats.
Once the hydrometer has been immersed into the solution, its position indicates the specific gravity of the solution. The higher the number, the less dense the solution is.
Bottle Filler
A bottle filler is used to fill bottles with beer after they have been cleaned. There are two types of bottle fillers – manual and automatic.
Manual bottle fillers require a lot of effort and time to operate. They also tend to be quite expensive. Automatic bottle fillers, however, are much easier to use. They simply take care of the hard work for you.
Bottling Bucket
A bottling bucket is used to store empty bottles after they have been filled with beer. This helps prevent contamination of the beer inside the bottles.
Once you have finished filling all the bottles with beer, you can then proceed to move all the bottled beer to an area where it can begin the maturing process, such as a fridge, wine cellar, or basement!
Beer Engine
An extract brewer is a device that extracts the sugars out of malted barley during brewing. It does this by boiling hot water over malt.
The result is called wort. Wort contains sugar which makes it suitable for creating beer. You would then add hops to the wort to create beer.
The beer engine is one of the most important pieces of homebrewing equipment because, without it, you cannot brew beer!
Carboy
A carboy is a glass vessel that is used to grow yeast cells. After the yeast grows, it ferments the wort, turning it into alcohol.
Some people call them “carboys” but some others refer to them as “buckets”.
We recommend that you buy new buckets every single time that you brew so that you do not contaminate your beer with any old yeast cells.
Cleaner
A cleaner is a chemical that is used to clean items like kettles and other metal parts.
It is very important to keep your home brewery clean at all times so that you will not end up contaminating your beer.
Cooling Coil
A cooling coil is a copper tube through which cold water flows. It is used to cool down your wort before you boil it.
If you do not use a cooling coil, then your wort might get too hot and kill off the yeast cells.
Fermenter Vessel
A fermenter is a vessel that is used to hold the wort while it undergoes fermentation. Fermentation occurs when yeast cells consume the sugar contained within the wort.
As the yeast cells eat away at the sugar, carbon dioxide gas is released. The gas acts as a preservative and keeps the beer fresh.
Filler
A filler is a piece of equipment that is used to put air in kegs.
So, if you are going to be using a keg (such as a corny keg) as your fermentation vessel of choice then you are going to need to make sure that you have a filler inside your homebrewing arsenal!
If you’re not already aware, kegs are containers that contain beer and pressure.
Without enough air in the keg, the beer may become flat and lose its flavor – so it’s vital that you have a filler inside the keg while you are fermenting it.
The Different Homebrewing Ingredients You Will Need
Now that we have talked you through all the essential pieces of homebrewing equipment that you are going to need, we are now going to be talking you through all the main ingredients that you are going to need to make sure that you have in order to brew your own beer from home correctly.
Below, you will find a list of all the main ingredients that you will need to have, as well as a description of each one to help you better understand the differences between all of them:
Malted Barley: This is what gives beer its body and flavor. It also helps to give the beer its head.
Hops: These are flowers that come from a vine-like plant called Humulus lupulus. They are added to the wort to give the beer its bitterness and aroma.
Yeast: This is an organism that eats the sugar in the wort and turns it into alcohol. This is why they are sometimes referred to as “beer bugs”.
Water: You cannot make good beer without good water. Make sure that you only purchase distilled or deionized water for this purpose.
Sugar: This is another ingredient that is needed to make good beer. There are many different types of sugars that can be used depending on what type of beer you want to make.
As we have already discussed above, there are a variety of alternative ingredients that you can use to prepare your home brewed beer.
The list that we have shared with you above are the most basic and commonly used ingredients when it comes to home brewed beer.
Why Should I Start Brewing Beer At Home?
There are plenty of reasons why you should consider starting up a home brewery.
For starters, if you live in a country like Australia, Canada, New Zealand, or the United States, chances are that you won’t find a local store that sells craft beer.
As a result, you’ll probably end up having to travel quite far to purchase the products that you want.
On top of that, some countries don’t allow you to buy certain types of beer because they contain too much alcohol.
When you decide to start brewing beer at home, however, you can easily create your own beers that meet these restrictions.
You can also save money by buying your ingredients in bulk.
Another great benefit of homebrewing is that it allows you to experiment with different recipes. By experimenting with different combinations of ingredients, you can create new flavors for yourself and others to enjoy.
Also, since you are brewing your own beer, you can control exactly what goes into it.
No longer will you have to settle for bland, mass-produced beer that tastes nothing like the real thing.
Finally, homebrewing gives you the opportunity to learn about all aspects of the beer industry.
From understanding the chemistry behind the brewing process to learning about the history of beer, there’s so much to know about the subject!
Setting Up Your Home Brewery
When you first begin brewing, you’ll need to figure out where you want to keep your equipment.
It’s best to choose a place that has enough room for your brewing setup as well as somewhere that isn’t going to be affected by extreme temperatures.
For example, if you plan on brewing outside during the summer months, you might want to think about keeping your equipment inside.
You’ll also want to make sure that your brewing area doesn’t have any strong odors.
This means that you shouldn’t use your kitchen or bathroom when you brew. Instead, you should look for an isolated space such as a basement or garage.
If you do decide to brew indoors, you’ll want to take extra precautions to ensure that no one else comes near your brewing area.
That way, you can avoid getting sick from someone else’s germs. In addition, you’ll want to cover your work surface with a cloth or paper towel to prevent spills.
Finally, you’ll want to clean your equipment thoroughly after each use.
If you plan on using a stove top, you’ll want to make sure that it’s not too hot. You don’t want to burn yourself while trying to boil water.
Now that you have your equipment figured out, let’s talk about how to set up your brewery.
Brewery Setup
To brew beer, you’ll need to prepare two things: malt extract and yeast. Malt extract is made from malted barley.
Malting is the process of germinating grains in order to convert their starches into sugars. After they’ve germinated, the grains are dried and ground into a powder called malt.
Malt extracts are available in either dry form or syrup form. Dry malt extract is more convenient because it doesn’t require boiling.
However, it does contain less sugar than syrup-based malt extracts.
On the other hand, syrup-based malt extracts are cheaper to produce and easier to transport. They’re also easier to dissolve in cold water.
Yeast is used to ferment the wort (the mixture of water and malt extract) into beer. There are many types of yeast available, but most brewers use ale yeast.
Ale yeast ferments at lower temperatures than lager yeast, which makes it ideal for making ales.
Once you have prepared these two ingredients, you will then need to make sure that you have prepared your primary vessel!
The primary vessel is the container in which you mix your malt extract and water together.
The type of vessel you use depends on whether you are planning on doing batch sparging or continuous sparging.
Batch sparging involves adding the malt extract and water directly to the mash tun.
Continuous sparging involves adding both the malt extract and water to a separate vessel before transferring them to the mash tun.
The next step is to add some hops to your primary vessel. Hops are added to increase the bitterness level of your beer.
Most homebrewers like to use whole cone hops. Whole cone hops are unprocessed and still contain all the oils and resins that give beer its flavor.
After you have prepared these two ingredients and your primary vessel, you’ll be ready to start brewing.
Let’s go over some basic steps before we talk you through some simple, step-by-step instructions:
1. Water Preparation
This is going to be the first step in brewing! Before you do anything else, you’re going to need to take a moment to first make sure that your water has been properly prepared.
If you’ve never brewed before, this may seem a little confusing, but once you get started, you’ll find that it’s actually quite simple.
With that being said, the first thing you need to do is collect your water. Most people prefer to use tap water, but bottled spring water is also acceptable.
Once you’ve collected your water, you’ll want to heat it until it reaches 180 degrees Fahrenheit. It’s important that you are using clean, fresh water.
Boiling your water will be the next step that you’re going to need to complete while you are making your very own homebrewed beer!
Once your water is heated, you’ll want to add it to your brew pot. Make sure that there’s plenty of headroom in your brew pot so that you won’t end up with foam overflow.
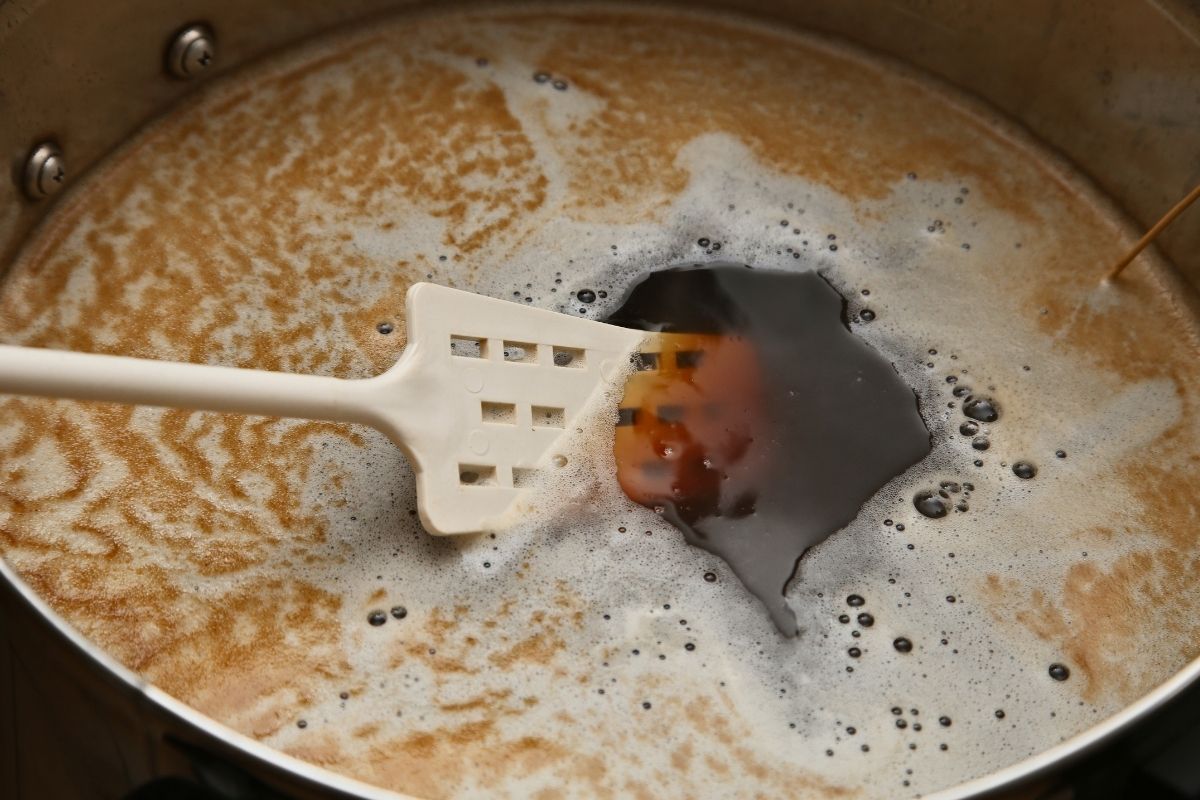
Next, you’ll want to bring your water to a full rolling boil. The goal here is to kill all bacteria present in your water.
If you wait too long, however, you’ll risk killing off the yeast that will be added later.
2. Adding Additional Extracts
Next, you’ll want to pour your malt extract into your brew pot. It’s important to note that you only need enough malt extract to fill half of your brew pot.
This ensures that you have room to stir without spilling any liquid.
3. Stirring
You’ll now want to stir your malt every 30 minutes or so. This helps distribute the enzymes in your malt extract throughout the water.
As the enzymes break down the starch molecules, they release sugars. These sugars then become alcohol and carbon dioxide during fermentation.
4. Cool Down Process
Finally, you’ll want to cool your malt mash by adding ice cubes. The goal here is simply to reduce the temperature of your malt to around 150 degrees Fahrenheit.
You can leave the malt on the stove top overnight if you like. Just make sure that you keep an eye on it.
5. Mash And Sparging
When your malt mash has cooled sufficiently, you’ll want to slowly pour it into your mash tun.
A mash tun is basically a large container that holds your grain. You’ll want to mix your grain thoroughly with your malt.
Sparging is the process of rinsing out the husks from your grains. This removes excess starches and proteins that could potentially interfere with the efficiency of your mash.
6. Lautering
Lautering is the process of separating your wort from your spent grains. This involves filtering your wort through a series of screens called lauters.
7. Wort Collection
Once your lauter tun is filled with wort, you’ll want to transfer the wort into your kettle. Be careful not to disturb the sediment at the bottom of the lauter tun.
8. Heat Up
Now you’re ready to heat up your wort. You’ll want to heat your wort to about 170 degrees Fahrenheit. This is when you pitch your yeast.
9. Ferment
Now that you’ve pitched your yeast, you’ll want to ferment for about two weeks.
During this time, your yeast will eat away at the sugar molecules in your wort. As a result, your wort will turn into beer.
10. Transfer To Secondary Vessel
After 2-weeks, you’ll want to siphon your beer into a secondary vessel. Use caution when transferring your beer as hot liquids can cause burns.
11. Bottle
Bottling day is finally here! First, sanitize your bottles and caps using a solution of one part bleach to nine parts water.
Then just place corks in each bottle, cap them, and shake vigorously. Voilà! Your homemade beer is ready to begin the maturing process.
12. Mature The Bottled Beer
To mature your beer, you’ll first want to store it somewhere dark and cold. Ideally, you should store your beer in a refrigerator. But a basement closet will also work!
13. Drink!
At some point, you may want to drink your beer. Remember that the older your beer gets, the better it tastes.
That said, you don’t necessarily have to wait until your beer reaches its peak before enjoying it.
Brewing Your First Beer: Step-by-Step Instructions!
So, now that we have broken down the main steps that you will need to follow to brew your own beer, now we are going to be sharing with you some simple and easy-to-follow step-by-step instructions that you can begin following today!
To brew your first batch of beer, follow these steps:
Step 1
Pour 1 gallon of water into your pot. Make sure that the water temperature is between 170 °F and 180 °F.
Step 2
Add 2 pounds of crushed grain to the pot. Stir thoroughly to ensure that all the grain has been mixed with the water.
Step 3
Cover the pot with its lid and place it over medium heat. Bring the mixture to a boil. Once boiling, reduce the heat to low and allow the mixture to simmer for 30 minutes.
Step 4
After 30 minutes, remove the lid and stir the contents of the pot. You should see bubbles forming around the edges of the pot.
If you don’t see any signs of fermentation, increase the heat to high. Allow the mixture to boil vigorously for another 15 minutes.
Step 5
Remove the pot from the stove and turn off the burner. Let the mixture cool down before transferring it to your primary fermenter.
Step 6
Transfer the cooled wort to your primary fermenter using a siphon hose. Use caution when doing this because hot liquids can burn you easily.
Step 7
Attach an airlock to the opening of the fermenter. Place the fermenter in a dark area where it won’t be disturbed.
Wait until the fermentation process is complete before moving on to the next step.
Step 8
When the fermentation process is complete, transfer the fermented wort to a secondary fermenter.
This is done by attaching a siphon hose to the airlock and then pouring the wort through the tube to the second vessel.
Step 9
Clean out the primary fermenter and attach a new airlock. Then, pour the remaining wort into the primary fermenter.
The wort will continue to ferment in the primary fermenter until the alcohol content reaches about 5% ABV. At this point, you need to move on to the final stage of the brewing process.
Step 10
Rack the beer into bottles or kegs.
Step 11
Age the beer for 3 weeks.
Step 12
Enjoy your freshly brewed beer!
By reading through the steps that we have shared above, it can be easy to think that preparing homebrewed beer is going to be a walk in the park.
However, we’re sure that you’ll agree with us when we say that the process, in reality, can be pretty tricky.
That’s why, below, we are going to be taking a more detailed look at some of the more complex steps of the home brewing process.
Make sure that you have a pen and paper handy so that you can make some notes!
Let’s check out the following sections:
Preparing The Fermentation Vessel
First things first, you’re going to want to make sure that you have prepared your chosen fermentation vessel in order to begin the homebrewing process.
There are many different types of fermentation vessels available to you to use, including corny kegs, carboys, buckets, and even plastic jugs.
Each one has its own advantages and disadvantages. For example, some are easier to clean than others.
In addition, you may be able to find pre-made kits that already have everything you need. However, this option is usually more expensive.
Regardless of which type of vessel you decide to use, you should always sanitize it before using it. You can accomplish this by soaking the vessel in hot water for 10 minutes.
Afterward, rinse it thoroughly with warm soapy water.
If you plan on bottling your brew, you’ll also need to purchase bottles. Most breweries sell them individually, but they can also be bought in bulk.
The next step is to pitch the yeast into the vessel. If you are brewing a lager, you will want to pitch the yeast when the temperature reaches 50 °F.
If you are making an ale, you will want to wait until the temperature reaches 70 °F.
Once the yeast has been pitched, cover the vessel with a lid and let it sit undisturbed for about 24 hours.
This allows the yeast to start working on converting the sugars in the wort into alcohol.
After the initial fermentation period, you will want to aerate the wort by stirring it up with a spoon. This helps oxygen get into the wort and promotes healthy fermentation.
After the wort has fermented, you will want to transfer it into another container where you can store it until it’s time to bottle.
Bottling Your Beer
Now that you’ve made your beer, it’s time to bottle it!
This step can be a little trickier than first meets the eye, which is why we have created a dedicated section to uncover this step a little more.
There are several ways to go about bottling your beer. Some people prefer to use carbonated beverage machines, but these are not necessary.
In fact, if you don’t feel comfortable doing it yourself, you can always hire someone who does.
To bottle your beer, you will first need to sterilize the bottles.
To do this, boil the bottles in a large pot of water for 5 minutes. While they are boiling, you will also want to fill each bottle with cold tap water.
When the bottles are filled with cold water, remove them from the heat and allow them to cool down completely. Then, place them in a refrigerator overnight.
When it comes time to bottle your brew, simply add the desired amount of sugar or corn syrup to the fermenter. Mix well and then pour the mixture into the bottles.
Once all the bottles are full, screw on their caps and put them back in the fridge.
You can drink your home brewed beer right away, but most people prefer to age it for a few weeks or months before enjoying it.
During this aging period, the flavors develop and become more complex.
Cold Crashing
If you want to make an even better tasting beer, try cold crashing. Cold crashing involves chilling the wort prior to fermentation.
It also helps to clarify the beer so that sediment doesn’t form during the fermentation process.
The best way to do this is to chill the wort as quickly as possible after brewing. Chilling the wort is not difficult, but it does require some equipment.
The easiest way to chill the wort is to use a refrigerator. Simply take the carboy containing the wort and place it inside the fridge. Don’t open the door for at least 24 hours.
Another option is to use a wort chiller. A wort chiller is basically a large plastic bag filled with ice. The bag is placed directly in contact with the wort. The ice melts slowly, cooling the wort.
You can also freeze the wort. Just put the carboy in the freezer for several days. Make sure that the carboy isn’t frozen solid, though.
Otherwise, you risk cracking the container. Once the wort is chilled, pitch the yeast, the fermentation process will then begin.
How To Condition Homebrewed Beer
If you want to make your own beer, you have to know how to condition it properly.
Conditioning is the process of adding yeast to the finished product so that it ferments and produces carbon dioxide as part of the normal metabolic activity of the yeast cells. It also adds body and flavor to the beer.
The best way to condition homebrewed beer is to use a carboy (a large glass container) instead of a bottle. A carboy allows you to control the temperature of the beer better than a bottle does.
Also, if you are going to use a bottling bucket, you will have to add some sugar to the beer to help prevent the formation of hard-to-remove deposits called “fizzy gunk” on the inside of the bottle.
You can condition your beer at home by following these simple instructions:
Put the beer into a clean carboy.
Fill the carboy up halfway with fresh filtered water.
Pour enough yeast into the carboy to fill it completely.
Close the top of the carboy and shake it gently to mix the yeast with the beer.
Set the carboy aside somewhere warm and let it sit for 24 hours.
Check the gravity of the beer after 24 hours. If it has dropped below 1.010, add more yeast.
Continue to check the gravity every day for the first week.
After one week, start checking the gravity again but this time only once per week.
Once the gravity stabilizes at 1.020, stop checking the gravity.
Bottle the beer when it is ready.
Transferring Beer From One Vessel To Another
When transferring beer from one vessel to another, be careful not to splash any of the beer onto yourself or anything else.
This could result in contamination. Always wear gloves while handling the beer.
To transfer beer from one vessel to the next, follow these steps:
Remove the lid from the original vessel.
Carefully pour the beer into the new vessel.
Replace the lid on the new vessel and give it a good shake to get rid of any air bubbles.
Let the beer settle before transferring it to your bottles.
Homebrewing Dos And Don’ts
Before we finish this guide, we think that it would be a good idea to finish off with some homebrewing dos and don’ts!
As we’re sure you can agree from everything that we have covered above, it can be pretty overwhelming to even know where to begin with homebrewing – especially if you don’t have any prior experience in homebrewing.
That’s why, below, you will find a helpful breakdown of some of the most useful tips you can implement into your homebrewing process:
Do’s
Follow the Instructions Provided By Your Supplier/Manufacturer
If they are clear and concise, there is no reason not to follow them!
Not only that, by making sure that you are following the instructions provided by your manufacturer, you will ensure that you are not making any mistakes and that you have the best chances of your homebrewed beer turning out perfectly.
Use Quality Ingredients
Good quality ingredients make great-tasting beer.
If you’re looking to get the very best value for your money, we recommend that you purchase your ingredients in bulk (if you’re a regular homebrewer) or consider buying homebrewing packs/bundles that contain all the ingredients that you will need to make your own beer without requiring you to purchase any extras.
Be Patient When Waiting For The Beer To Ferment
The longer you wait, the better the taste will be!
The fermentation process can take anywhere from 2 weeks to 2 months, so make sure that you are patient and willing to wait out the process. It’ll certainly be worth it in the end!
The same also goes for the beer maturing stage, as this can also take anywhere from 2 weeks to 2 months… and sometimes even longer than that!
Make Sure Your Equipment is Clean
Dirty equipment can affect how well your beer turns out!
After every use, you should be sure to make sure that you are thoroughly cleaning all of your homebrewing equipment to ensure that it is all clean and sanitized, and ready for future use.
It’s also important to make sure that you are cleaning all of your homebrewing equipment after you have used it to ensure that the quality and performance of all of your homebrewing equipment do not become affected.
Keep Records Of What You’ve Brewed
These records help you track your progress and improve your skills.
This is a super useful tip that we strongly recommend that you implement, especially if you are just getting started in homebrewing.
By making sure to keep a record of all the different beers that you have brewed, you will be able to see your progress, while also being able to make note of any mistakes or problems you encounter to help improve your future homebrews.
Have Fun! Brewing Beer isn’t Hard
Just remember to enjoy yourself while doing it. If you’re just getting started in the world of homebrewing, it can certainly become very easy to get discouraged if something goes wrong.
However, it’s very important to remember that the most important part of the homebrewing process is your enjoyment – so make sure that you are keeping fun at the forefront of your mind, even if you make a mistake or do something wrong.
Don’ts
Don’t Try to Save Money on Ingredients
Quality ingredients are worth their weight in gold.
Similar to investing in quality equipment, we also strongly recommend that you also invest in high-quality ingredients, as it will only ensure that you end up with the finest quality homebrewed beer at the end when it’s time to drink it!
Don’t Forget to Take Care of Your Equipment!
It’s very important that you make sure that you are never leaving your homebrewing equipment dirty after you are finished using it all.
If you do not make sure that your home brewing equipment is clean and maintained, not only will you find that your equipment begins to dry, a dirty fermenter will ruin your entire batch.
Don’t Get Discouraged If Things Go Wrong
Sometimes it takes a couple of tries to perfect something!
This is definitely the case when it comes to home brew, so you should expect to make a few mistakes as you get the hang of all the different equipment you need to use and steps that you need to take, especially when you are just starting out.
Don’t Expect Instant Results
Beer takes time to mature. As we have already mentioned above, homebrewing will typically be a process that takes a few months from start to finish.
It can take even longer if you want to give your completed beer more time to mature – as many people will often allow their homebrewed beer to mature for a period of around 2 months or even longer before they drink it.
Don’t Waste Your Money on Expensive Equipment
Cheap equipment won’t last very long. Instead, we recommend that you consider saving up and investing in high-quality homebrewing equipment.
Frequently Asked Questions
How To Choose The Best Fermentation Vessel?
The fermentation vessel is one of the most important parts of home brewing.
It determines how much time it takes to get the job done, how easy it is to clean up after yourself, and whether, or not, the finished product tastes good.
There are many different types of vessels available on the market today. Some of them are made specifically for homebrewing while others are designed for commercial purposes.
Regardless of what type of vessel you decide to buy, make sure that it is large enough to hold the amount of liquid you plan to brew. Also, look at the material used to construct the vessel.
Stainless steel is generally considered to be the best choice since it doesn’t react with the chemicals used in the brewing process.
However, if you want to save money, aluminum may work just as well. Keep in mind that stainless steel tends to cost more than aluminum but it lasts longer.
What Is A Primary And Secondary Fermenter?
A primary fermenter is a container that holds all the ingredients needed to create beer.
A secondary fermenter is a smaller container that contains only the beer itself once it has been transferred from the primary fermenter.
Secondary fermenters usually have a spigot attached so they can be connected to a bottling bucket or keg.
Why Do I Need A Primary And Secondary Fermenter?
There are two main reasons why you would use both primary and secondary fermenters:
You don’t want to lose any of the precious sugar during the first few days of fermentation.
You want to keep the yeast alive long enough to finish the job. If you leave the yeast alone too long, it will die off and the beer will become flat tasting.
How Do I Connect My Fermenter To A Bottling Bucket?
When you are ready to bottle your beer, you need to transfer the beer from the fermenter to a bottler. The easiest way to do this is by using a siphon tube.
Siphons come in various sizes and shapes depending on their intended purpose. They also vary in price. Make sure that whatever you buy is compatible with your specific setup.
How Do I Sanitize My Bottles?
Before you begin bottling, you need to sanitize the bottles. Sanitation is very important because it prevents the growth of bacteria and other microorganisms that could ruin your beer.
When you are cleaning your bottles, make sure to rinse them thoroughly under running water. Then, place them upside down in a solution of chlorine bleach (1 part bleach to 9 parts water).
Allow the bottles to sit in the solution for 15 minutes before rinsing again. Finally, allow the bottles to dry completely before storing them away.
How Do I Store My Homebrew Beer Bottles?
Once you have bottled your beer, you need somewhere safe to put it until it is ready to drink. Store your bottles upright in a cool dark location.
Ideally, you want to store your bottles between 45°F and 50°F. Never refrigerate your beer.
How Do I Carbonate My Own Beer?
After you have bottled your beer and stored it properly, it is time to carbonate it.
Carbonating beer involves adding CO2 gas to the beer. This helps to preserve the freshness of the beer and gives it a nice fizzy taste.
There are many different types of carbonation systems available.
Some people prefer to use a counter-pressure system while others prefer to use an open-top method. Either one works well as long as you follow the instructions carefully.
What Is The Difference Between A Keg And A Carboy?
A keg is a large container used to hold beer. It has a tap at its bottom so that you can easily dispense the beer into serving glasses or directly into another vessel such as a growler.
Kegs usually cost more than carboys but they last longer.
Carboys are smaller containers that are easier to transport around. They are typically made out of glass.
What Is A Hydrometer For Homebrewing?
A hydrometer is a tool used to measure the specific gravity of a liquid. Specific gravity refers to how much sugar is dissolved in a given volume of liquid.
Hydrometers come in two forms: digital and analog. Digital hydrometers are easy to read and inexpensive. However, they only work with liquids that are clear.
Analog hydrometers are more expensive but they give a more accurate reading. Both types of hydrometers are useful tools for home brewers.
What Is A Refractometer?
Refractometers are small handheld devices that are used to determine the percentage of alcohol content in a beverage.
These instruments are commonly used when making wine since they are able to tell you if there is enough sugar in the grapes to turn them into wine.
A refractometer measures the amount of light that passes through the sample. As the concentration of alcohol increases, less light will pass through the sample.
Do I Need A Thermometer For Homebrewing?
Yes, we recommend that you use a thermometer if you are planning on brewing your own beer from home.
Thermometers are temperature measuring devices that can be used to check the temperature of various things.
You may already own a thermometer. If not, you can purchase one from any local hardware store.
The most common type of thermometer is the mercury thermometer. Mercury thermometers are cheap and simple to use. However, they are dangerous to handle and dispose of properly.
For these reasons, many people choose to use electronic thermometers instead.
Electronic thermometers are safer to use and they also provide more detailed information about the temperature being measured.
How Do You Choose The Best Malt?
You will also need to buy malt extract if you are going to use grains instead of malted barley.
It is important to note that not all-malt extracts are created equal. Some contain too much sugar, while others lack flavor.
When choosing malt extract, look for those that are made from 100 percent malted barley.
They tend to taste better than those that are made from corn syrup.
Hops are used as flavoring agents to add bitterness to beer. There are two types of hops that you can use: American-grown hops and European-grown hops. Both varieties impart different characteristics to the finished product.
American-grown hops are often described as having citrus notes. They are great for adding flavor to pale ales. European-grown hops are known for their earthy tones. They work well in darker styles such as stouts and porters.
How Do You Choose The Best Yeast?
Finally, we come to yeast. Although there are thousands of strains available, most people choose to use either ale or lager yeasts.
Ale yeasts ferment at warmer temperatures (70 °F) and impart fruity aromas while lager yeasts ferment at cooler temperatures (50 °F).
A good rule of thumb is to use ale yeast during the summer months and lager yeast during the winter months.
Final Thoughts
We hope this article has helped you learn how to brew beer at home!
We hope that you found our tips helpful and that you are now feeling ready to take on your first attempt at preparing your very own home-brewed beer from the comfort of your very own home!
Remember, if you’re just getting started, it’s likely that you might find yourself making some mistakes. That’s okay though; mistakes happen – but don’t let them discourage you!
In fact, we encourage you to simply keep trying new things until you finally figure out exactly what works best for you, as well as the type of beer that you like to drink the most.
By following all the steps and guidance that we have shared above, we are sure that you will feel proud of yourself for being able to prepare your own delicious homemade beer at home in no time at all.
Hi, I’m Andrew Carr and I find beer fascinating. Not just drinking it (although that is a plus!) but everything about it. There is so much to learn - the fermenting process, the best glasses for each type, recipes to make at home… The list goes on!
I have been making my own beer for almost a decade now and I pride myself on my home setup. I’ve made sours, pale IPAs, stouts - you name it, I’ve probably made it in the comfort of my own home.
We use cookies on our website to give you the most relevant experience by remembering your preferences and repeat visits. By clicking “Accept All”, you consent to the use of ALL the cookies. However, you may visit "Cookie Settings" to provide a controlled consent.
This website uses cookies to improve your experience while you navigate through the website. Out of these, the cookies that are categorized as necessary are stored on your browser as they are essential for the working of basic functionalities of the website. We also use third-party cookies that help us analyze and understand how you use this website. These cookies will be stored in your browser only with your consent. You also have the option to opt-out of these cookies. But opting out of some of these cookies may affect your browsing experience.
Necessary cookies are absolutely essential for the website to function properly. These cookies ensure basic functionalities and security features of the website, anonymously.
Cookie
Duration
Description
cookielawinfo-checkbox-analytics
11 months
This cookie is set by GDPR Cookie Consent plugin. The cookie is used to store the user consent for the cookies in the category "Analytics".
cookielawinfo-checkbox-functional
11 months
The cookie is set by GDPR cookie consent to record the user consent for the cookies in the category "Functional".
cookielawinfo-checkbox-necessary
11 months
This cookie is set by GDPR Cookie Consent plugin. The cookies is used to store the user consent for the cookies in the category "Necessary".
cookielawinfo-checkbox-others
11 months
This cookie is set by GDPR Cookie Consent plugin. The cookie is used to store the user consent for the cookies in the category "Other.
cookielawinfo-checkbox-performance
11 months
This cookie is set by GDPR Cookie Consent plugin. The cookie is used to store the user consent for the cookies in the category "Performance".
viewed_cookie_policy
11 months
The cookie is set by the GDPR Cookie Consent plugin and is used to store whether or not user has consented to the use of cookies. It does not store any personal data.
Functional cookies help to perform certain functionalities like sharing the content of the website on social media platforms, collect feedbacks, and other third-party features.
Performance cookies are used to understand and analyze the key performance indexes of the website which helps in delivering a better user experience for the visitors.
Analytical cookies are used to understand how visitors interact with the website. These cookies help provide information on metrics the number of visitors, bounce rate, traffic source, etc.
Advertisement cookies are used to provide visitors with relevant ads and marketing campaigns. These cookies track visitors across websites and collect information to provide customized ads.


")


")

